21 Baseball Drills To Upgrade Velocity, Accuracy & Balance
Pitching Drills: Side Notes
We have listed various different types of pitching drills you can use with 8 year olds all the way up to adult.
The amount of equipment needed to support pitching development is pretty much minimal – however there are a few things we would recommend…
Aside from the obvious equipment we’d recommend picking up a few additional pieces such as; a pitching net with targets or strike zones and less conventional ‘equipment’ such as towels. These not only add an additional fun factor to practice but can help improve technique beyond just simply throwing ball after ball.
Another thing worth mentioning is that most of the drills below can be used and practiced in multiple environments. So, indoors, outdoors, minimal ground space, backyards are all covered.
In fact, sometimes you can actually use your environment to your advantage – a fence or wall for example could be great for some drills.
Other drills, especially for younger age groups will need adults or coaches to help them with.
Baseball Pitching Drills
Pitching Warm Up Drills
Out of all the positions in baseball, pitching can be the most prone to injury.
How you warm up for training and how you warm for a competitive game will differ slightly with training obviously giving you more freedom in what you can do without the limited amount of warm up pitches.
Aside from the individual preferences of each pitcher, most pitchers will at least follow a basic routine. While jogging is recommended, you’ll need to make you or your pitcher employ ‘pitching specific’ warm up drills to not only reduce the risk of injury but to prepare the body for what is, a really demanding movement for the body.
Finally, as a pitcher you really want to focus on your pitching mechanics the majority of the time. This will reinforce your technique and upgrade your pitching development over time.
Pitching Warm Up Routine
Details: For this drill you want to get on your knees and face a wall. Using a wall removes the need for a partner and is super easy to get going.
As you make the trow you want to rotate your body and try and loosen up the arms.
You can start this drill without a ball, progress to using a normal weighted ball and then even progress further into using a weighted ball.
To progress this drill even further, go to one knee and perform the same routine. Remember to finish over the front knee.
Finally, perform the same throw but this time within the split squat stance.
Check out the video for full details.
Band Warm-Up Drill
Details: For this drill you’ll need a set of J-Bands. You can pick them up in most sports stores and on Amazon for pretty cheap these days.
The great thing about using bands, is that they all come with different resistances so you can regress and progress the difficulty of the exercises as you please.
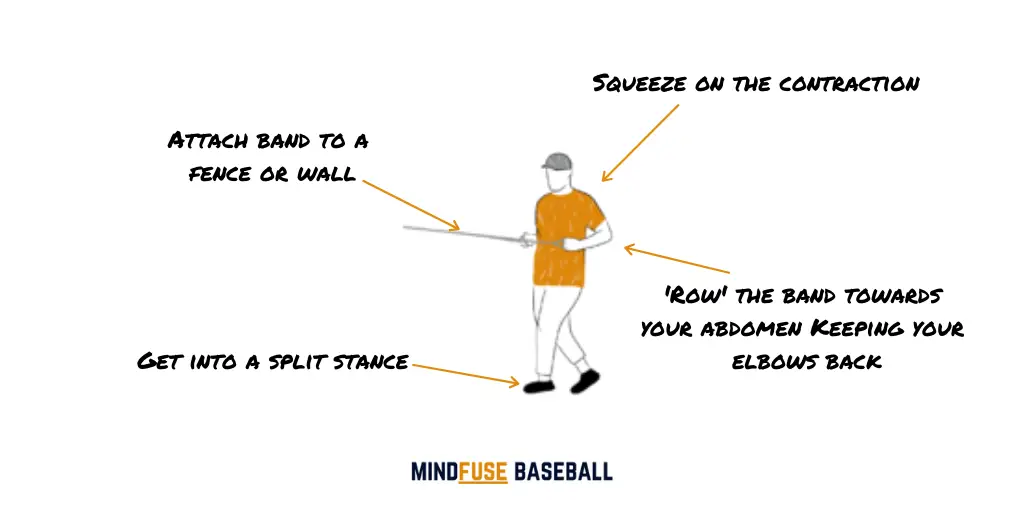
Exercise #1: Split Stance Standing Rows: Which work on your shoulders, biceps, upper and middle back
Get into a split stance and pull the band in a row position towards your abdomen. Squeeze your shoulder blades together as you contract the movement.
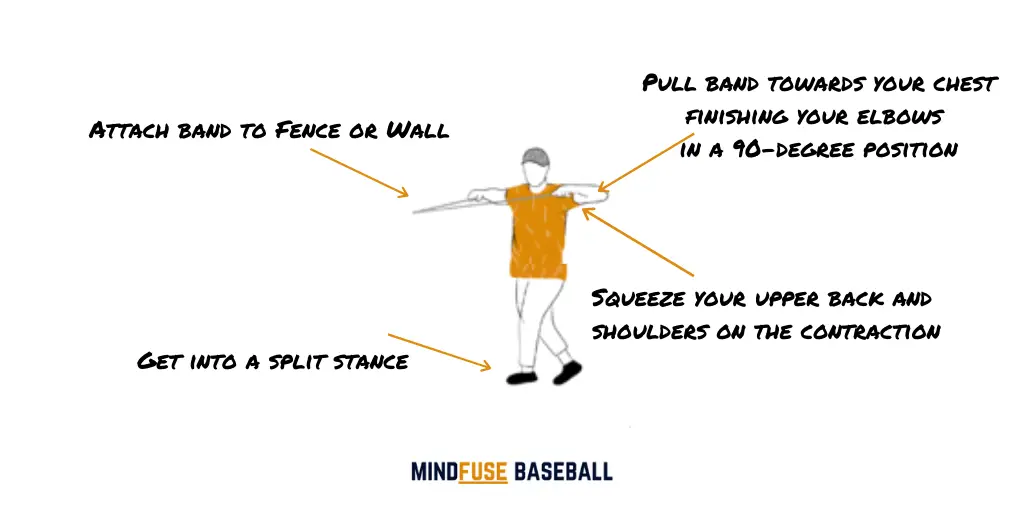
Exercise #2: Band Chest Pulls: Targets shoulders, elbows, upper back
Almost a face pull but not quite as you’ll be pulling the band towards your chest. Again contract your back and shoulder muscles while pulling with your elbows NOT your hands. Think of your hands as simply a set of hooks where the elbow does the work.
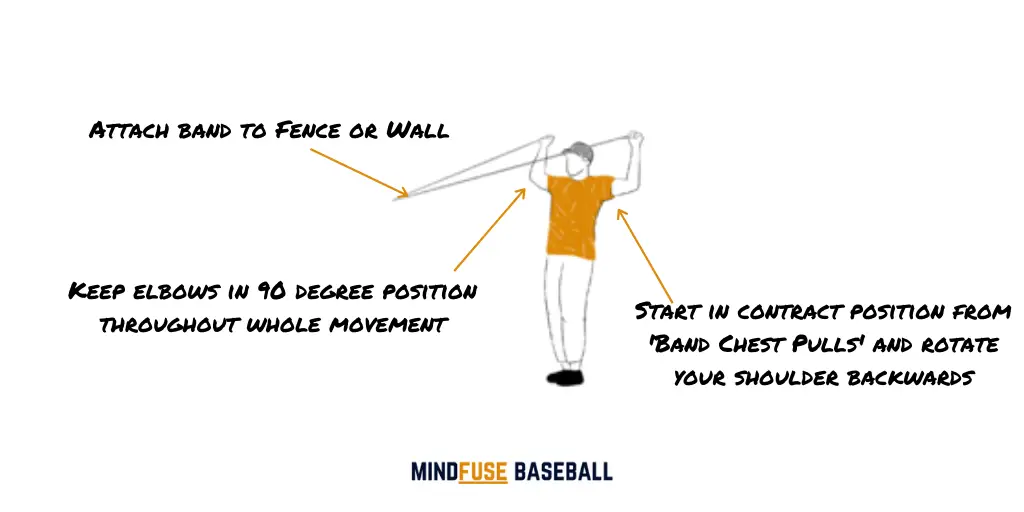
Exercise #3: Cuban Band Rotations: Rotator cuffs, shoulders, upper back
Cuban rotations or external shoulder rotations are fantastic for your rotator cuff – an area you gotta look after. Start in a 90-degree angle and rotate the shoulders backwards keeping the elbows at a 90-degree angle throughout the whole movement.
Aim for 12-15 reps across 3 rounds or sets.
Balance Drills
Push Off Drill
Why this drill? This drill focuses on developing balance specifically in the push off foot.
Details: This drill is real simple and can (and should) be used in conjunction with the other drills on this page.
Have your pitcher shift their weight onto their push off foot and raise their other knee up.
Now, there’s a few conditioning protocols you can do from here. You can have your pitcher hold the balance position for a period of time.
You can also have them start leading with their butt – if however your pitcher is struggling with leading with their butt, that’s where our next two drills come in handy…
Pitching For Balance
Why this drill? The next 2 drills are more specifically aimed at beginner and younger pitchers. Both drills focus heavily on both the control and balance aspects of a pitcher’s game.
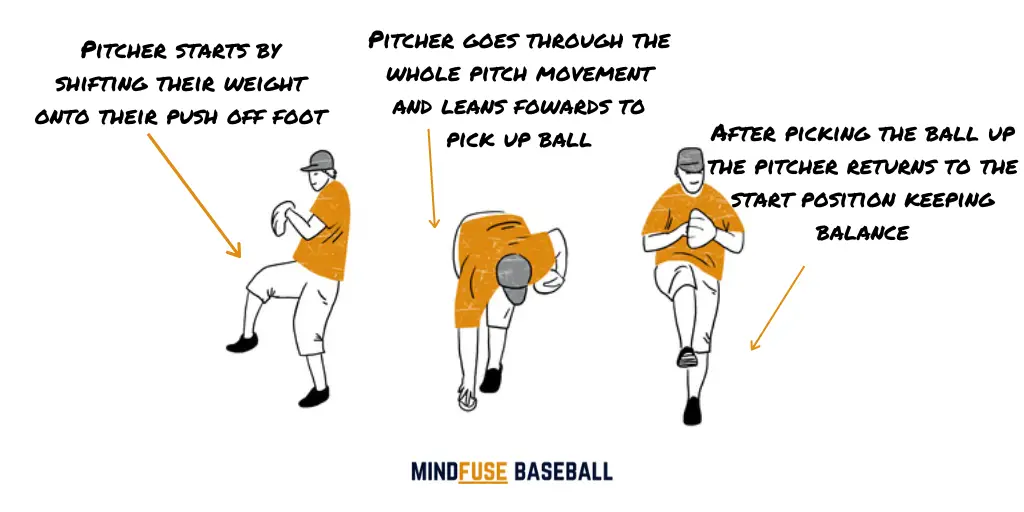
Details: For the first part of the drill, place a ball in front of the pitcher on the ground. Have the pitcher go through the delivery of the pitch. When they get to the end of the delivery, have them lean forward using an RDL movement and pick up the ball. They’ll then return to the balance position pre-pitch and then finally put the ball back on the ground and back to their starting position.
Leading Your Pitch
Details: This is a progression to the above drill to coach the proper way to pitch by leading with their butt before they release the ball.
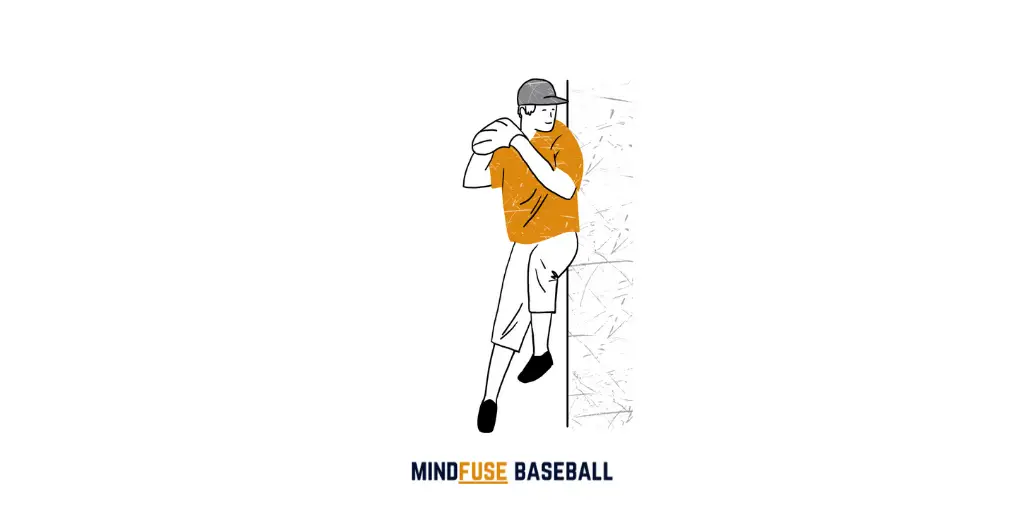
Have the pitcher line up against the wall with their pitching release side facing the wall. Have them raise their knee up and get them to lead with their butt – the only part of the body that should now lean into the wall should be their butt.
Ensure that their standing leg is slightly bent and that their other leg is NOT touching the wall. Again, the only part of the body that should be touching the wall is their butt.
Follow-Through Drills
High-Five Pitching Drill
Why this drill? After the ball is released, the pitcher must have a good follow through technique. And that’s what our next pitching drill focuses on.
Details: The pitcher gets into the pitch stance after release. One way of doing this is to kneel down next to your player and raise your hand as if you were to ‘high-five’ them.
Now when the pitcher follows through you’ll not only provide light resistance to their follow through but also guide them on the correct technique of throwing straight through the ball.
Another progression to this would be to use some sort of resistance band providing the resistance.
Follow Through Chair Drill
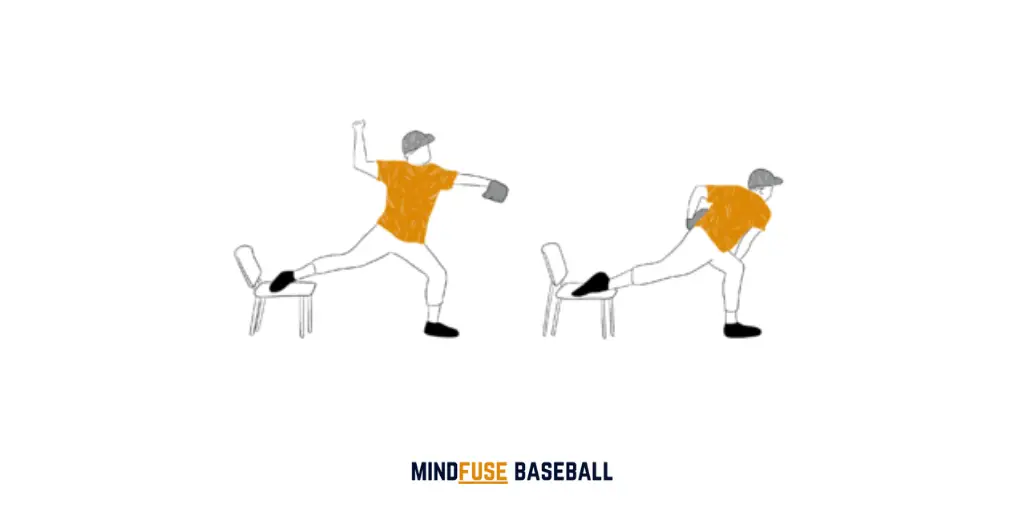
Why this drill? This drill takes the back leg out of the movement by placing it on a chair so the pither can solely focus on the follow through movement of the pitch.
Details: You’ll need a chair and to progress the drill a pitching target. Get the pitcher to place their back foot on the chair and move through the pitch with a focus on the follow through. The throwing arm should come across their front foot.
Progression: Try practicing without a ball first then progress to using a ball and pitching target.
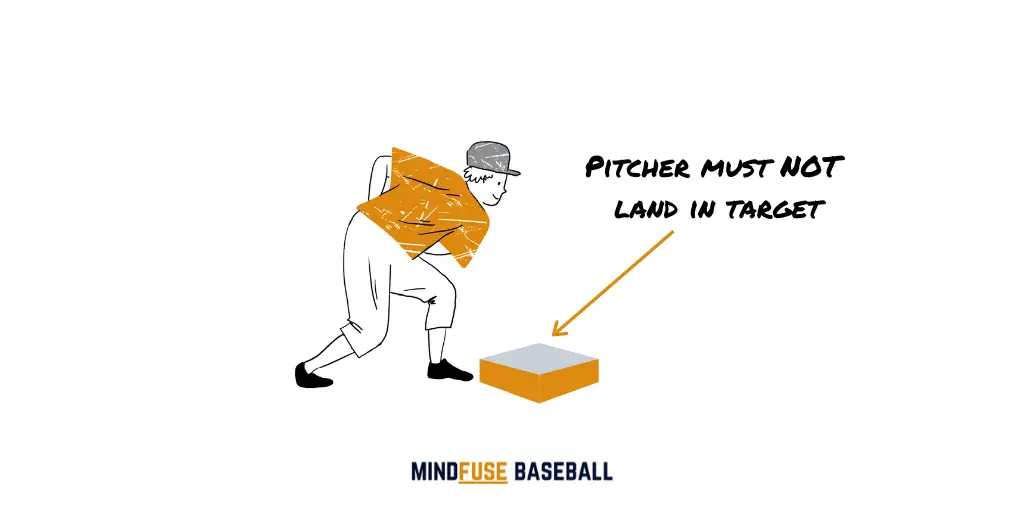
Why this drill? What you’ll find with youth players especially is their tendency to overstride when pitching. This drill looks to encourage players to focus on not overstriding by placing a mat, pad or other ground ‘target’ in front of them.
Details: Place a ‘target’ the pitcher must NOT land into after they pitch. Have your pitcher go through a few dry swings first ensuring they don’t land on the mat. Then progress to using a ball.
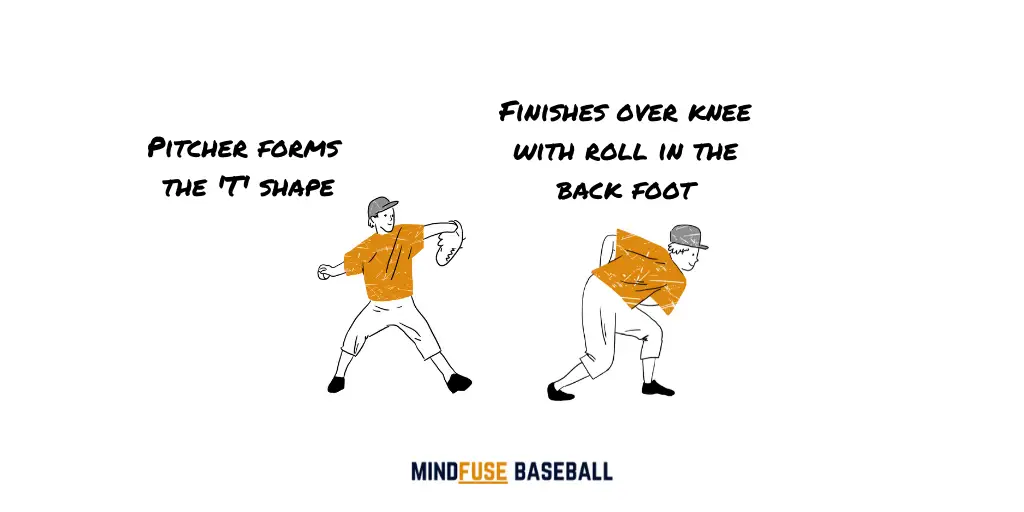
Heel Roll Up Pitching Drill
Why this drill? This pitching drills focus on encouraging your pitcher to successfully transfer movement and energy throughout the whole body. This will improve their technique and help increase both power and velocity of their pitch.
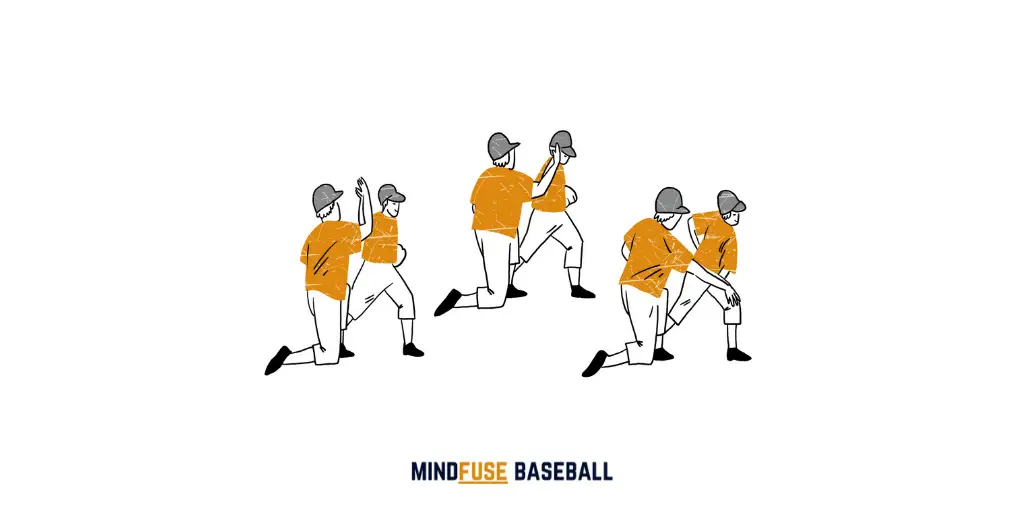
Details: Pitcher starts in the starting position. He then shifts the weight onto his back leg forms the ‘T’ shape with his hands and arms and finally follows through finishing with his chest over his lead leg and his back heel rolled up and slightly rolled.
You can and should start with some dry throws and then progress to using a ball. This drill can be done with both a net for individual practice or with a partner.
Staying Closed
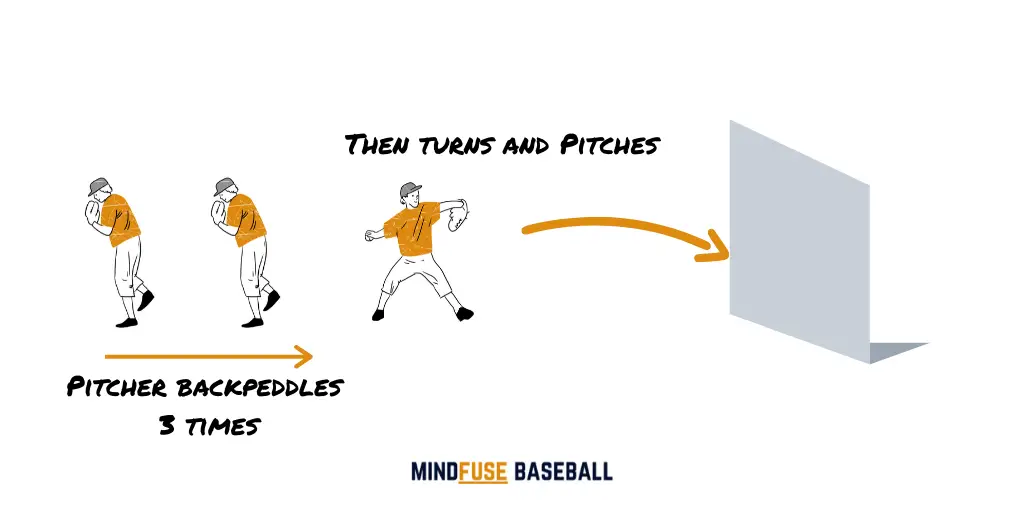
3-Step Backpeddle
Why this drill? A great way to encourage players to stay closed on their pitch and learn when to open up is to use the 3-Step Backpedal drill. It’s also a great way to coach your pitcher to block off and stop rotating so much.
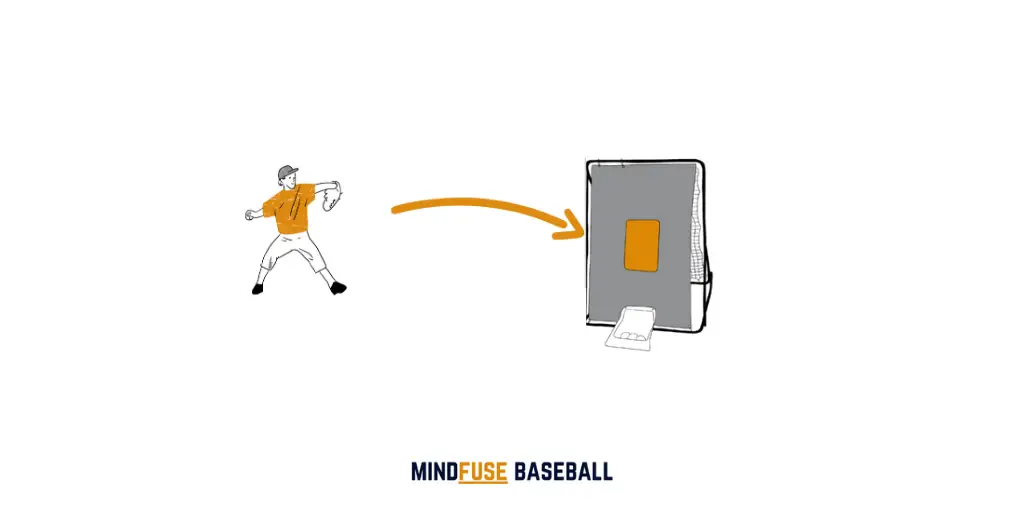
Details: Set your pitcher up facing away from the target in a ready position with knees slightly bent. The pitcher will then perform 3 backpedals before turning and making the pitch. You will need some sort of impact wall or material if practicing with a ball.
The Pocket Drill
Why this drill? A great way to encourage players to stay closed on their pitch and learn when to open up is to use the 3-Step Backpedal drill. It’s also a great way to coach your pitcher to block off and stop rotating so much.
Details: Set your pitcher up facing away from the target in a ready position with knees slightly bent. The pitcher will then perform 3 backpedals before turning and making the pitch. You will need some sort of impact wall or material if practicing with a ball.
Pitching Towel Drills
Why Towel Drills? There are a few pitching towel drills out there – each one offering a unique angle. In general though using towel drills to practice dry pitching mechanics is a great way to work on the release point and overall technique.
Towel drills are also a great way to practice the fundamentals of pitching at home or indoors.
Details: In this pitching towel drill you’ll be simulating realistic throwing movements while keeping your lower body movements to minimum.
Have you or your player kneel down on one knee with the ball and glove in each hand. From there you can practice your pitching ensuring that you follow through properly.
Target Towel Drill
Details: After practicing the above variation, you can move into completing the whole movement.
With this towel drill you’ll likely need a coach or another person to help you. You’ll need to place the target at the appropriate height depending on the release point that feels most comfortable for you (or the pitcher). You can use a glove or if you’ve got a way of ‘suspending’ your target high enough that works too.
Once you have your target in place it’s time to run through some pitches. Remember to focus on whipping the towel to make a clean hit with the target.
Pitching Accuracy Drills
Pitching Target Drills
You can pretty much use most of the drills on this page and progress them to using a pitching target.
Pitching targets come in many shapes and sizes and have additional target zones to aim for.
If you’re looking to throw faster, you need pitcher workouts to increase velocity. How many specific workouts do you actually know that will help you improve your arm strength?
First of all, velocity isn’t everything. If you throw 85 MPH and you have movement, that’s much better than throwing 92 MPH dead straight. If you can control your pitches and be efficient on the mound, that’s just way more productive than just throwing super hard.
With that being said, velocity is the one measurable that we use today in baseball to find out the potential of a pitcher. So, it is very important.
In addition, if you are a pitcher out there that can locate your pitches, create movement and keep batters off balance, then why wouldn’t you look for something out there that can increase your velocity?
3 Most Important Focus Areas
When you’re looking for pitcher workouts to increase velocity, you need to consider three things.
Strength
Explosion
Flexibility
To improve strength as a pitcher, you need to do exercises like squats, lunges and deadlift. These are great exercises to increase pitching velocity. These workouts make you stronger, more stable and able to control your body better.
Squats
Plyometric Exercises
Deadlifts
Lunges
Medicine Ball Drills
One of the best rotational explosive workouts is medicine ball training exercises. This mainly involves the twisting and turning (torque) of your midsection, shoulders and legs. Then, explosively releasing the ball to either the wall or the ground floor.
With this, you’re creating explosive rotational energy. This is one of the most important elements and what pitching is all about.

![Push Off Drill: Baseball Pitching Drills [MindfuseBaseball.com]](https://mindfusebaseball.com/wp-content/uploads/2020/06/Push-Off-Drill.png)
![One Knee Towel Drill: Baseball Pitching Drills [MindfuseBaseball.com]](https://mindfusebaseball.com/wp-content/uploads/2020/06/One-Knee-Towel-Drill.png)
![Towel Pitching Drill: Baseball Pitching Drills [MindfuseBaseball.com]](https://mindfusebaseball.com/wp-content/uploads/2020/06/Towel-Pitching-Drill.png)